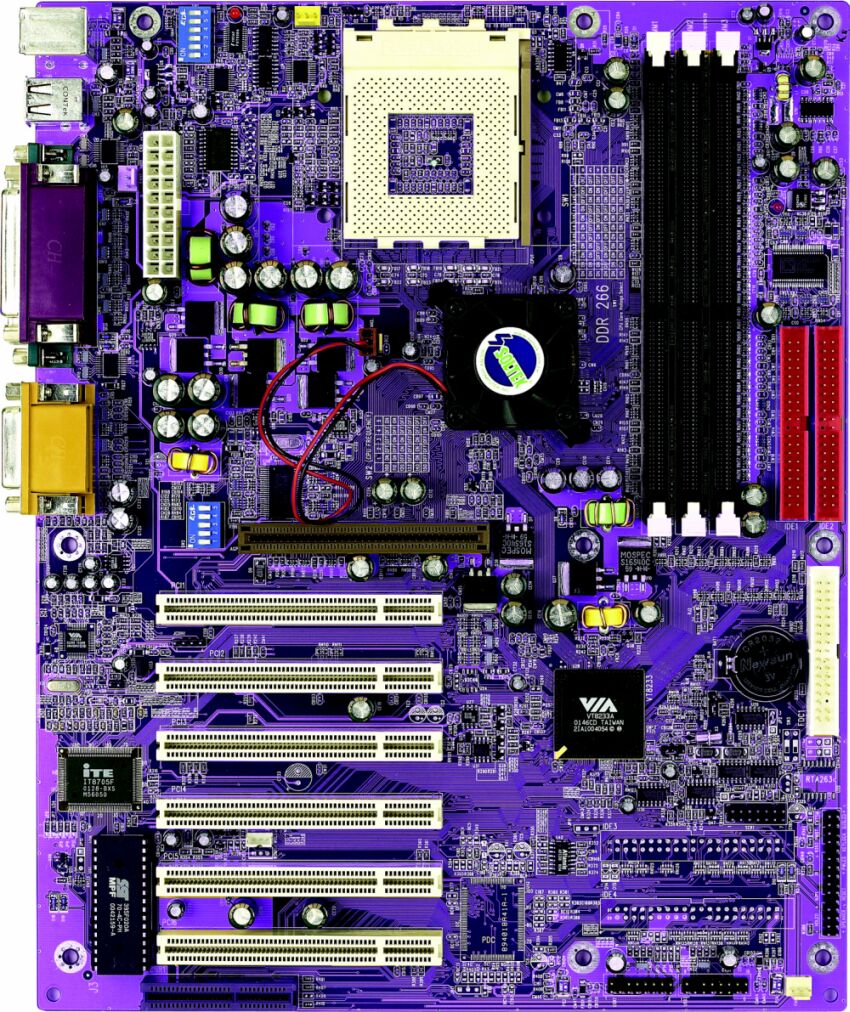
The
Layout
 The
SL-75ERV appears to correct many of the minor complaints I've had about the earlier
Soltek boards that have come my way. Probably the biggest improvement is the removal
of the horizontal IDE connectors. Soltek has designed this board with neat fitting
IDE connectors that are on the rightmost edge of the board. These connectors are
also centered on the vertical side of the board so reaching components in a full
tower shouldn't be a problem.
Feel
free to click on the enormo picture to the right to get a better look at the layour.
The CPU socket is located
on the very top of the board which is my favorite location for it. Three DDR slots
populate the area just to the right of the CPU socket. Although the picture to
the right shows the ERV with a nearly blue color fear not Prince fans! The actual
color is very close to a royal purple and far from the bluish tint you are seeing
in the picture. The picture was more than likely from a preproduction board before
the final color layout was decided on.
The
ATX power connector is also located in a good spot - to the right of the CPU socket
and far enough away as to not cause any fitment problems. Just above and below
the ATX connector are the jumpers for the mainboard. Fortunately you can totally
disregard them as all overclocking functions are now controlled in the BIOS. If
you really feel that you have to play with them go ahead but since that is a time
consuming process sometimes I'd recommend you simply pay close attention to the
BIOS instructions included in the owner's manual. One thing to point out about
the layout is that the northbridge fan occupies the fan connector directly below
the CPU socket. If you happen to need that second connector for your CPU HSF you
can be rest assured that the power wire for that northbridge fan will reach the
fan connector next to the ATXZ power connector. There is a fourth connector in
the lower right corner of the board that I found very useful for a case fan.
