THE
GOOD
A quick look
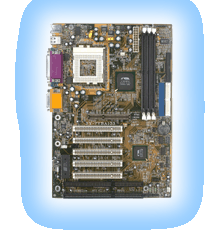
over the board reveals a fairly small board and a clean layout. The ATX power
connector is well placed between the CPU and the RAM slots, right where is should
be so you don't have to stretch it over the CPU or other components. CPU space
is not a factor as the socketed design relieves the need for a sloket adapter.
Included in the box is
only a "Quick start guide". It includes a very basic overview of how to install
the board and some driver installation. It is well written and helpfull in some
regards, but is only that, a quick start guide. The manual on the other hand is
very well written and does cover a lot of material. It's quite technical and does
note many small details which always seem to be the solutions to those nagging
problems. Kind of ironic, but the installation guide in the CD manual is much
better than the quick start guide. The guide is adequate, but the manual is much
more detailed including pin assignments for every connector, and the illustrations
make it nearly fool-proof. It deserves another mention is the fact that the pinouts
for every single connector are included, it may not sound like much, but it can
be a saving grace when your having communication problems. One also little note,
the quick start guide and CD manual contain conflicting information, for instance,
the Quick start guide does not list FP and ESDRAM as supported while the CD manual
does.
 The
one thing that really shines with this board is the RAM options and abilities.
The ability to run any combination of RAM types, independant from the front side
bus and the deluge of options is amazing. Theoretically, the maximum front side
bus speed is 153Mhz, but off hand I don't know of any RAM that could attain those
speeds, but the shear number of possibilities is dizzying. The timing control
is on a per-bank basis meaning that you can run very agressive timing on bank
1, while bank 2 putts along at normal speed, while bank 3 is running a semi-agressive
timing. The only time this is very usefull is if you have one stick of high performance
CAS2 RAM and one stick of slower CAS3, you can maximize your performance from
both sticks. The other very usefull feature is the ability to run the RAM synchronous
with the FSB, 33Mhz faster, or 33Mhz slower. So if you are running a 100MHz FSB,
and have PC133 RAM, you can bump up the RAM clock and maximize your performance.
Or if your running a celeron on a 66MHz FSB, you can bump up the clock to 100Mhz
and use PC100 RAM. On the flipside, if your running a 133MHz FSB, and only have
PC100 RAM, you can drop back the RAM speed.
The
one thing that really shines with this board is the RAM options and abilities.
The ability to run any combination of RAM types, independant from the front side
bus and the deluge of options is amazing. Theoretically, the maximum front side
bus speed is 153Mhz, but off hand I don't know of any RAM that could attain those
speeds, but the shear number of possibilities is dizzying. The timing control
is on a per-bank basis meaning that you can run very agressive timing on bank
1, while bank 2 putts along at normal speed, while bank 3 is running a semi-agressive
timing. The only time this is very usefull is if you have one stick of high performance
CAS2 RAM and one stick of slower CAS3, you can maximize your performance from
both sticks. The other very usefull feature is the ability to run the RAM synchronous
with the FSB, 33Mhz faster, or 33Mhz slower. So if you are running a 100MHz FSB,
and have PC133 RAM, you can bump up the RAM clock and maximize your performance.
Or if your running a celeron on a 66MHz FSB, you can bump up the clock to 100Mhz
and use PC100 RAM. On the flipside, if your running a 133MHz FSB, and only have
PC100 RAM, you can drop back the RAM speed.
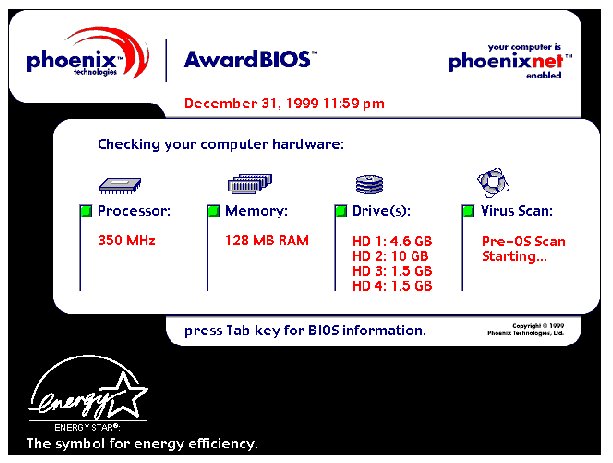
When
you boot up the 7VBA the first thing that strikes you is the nice graphical BIOS
screen that greets you. Although if you enter the BIOS you only get the plain
old text interface, it's always nice to impress your buddies even before your
hotrod boots.

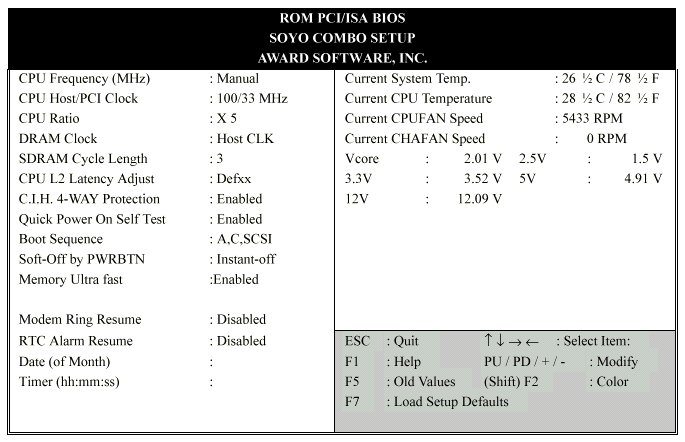
Once
in the BIOS you'll spot a menu named Soyo Combo Setup, memorize it because it's
about the only menu you need. Soyo was kind enough to stick most of the tweaking/overclocking
options in one menu. It just saves you a few seconds of scrambling through the
BIOS and usually a bit of agravation. Other than that, it's you standard Phoenix
BIOS.

