Installation and
Setup
 I
recommend in any networking project that you install your NIC cards first.
If you are going to have resource problems or detection problems with any
computer I think its better to find that out right off the bat before you
get too involved hooking up your hub/router and running all the wiring.
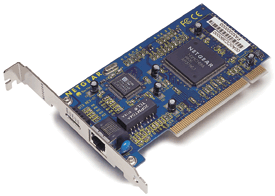
I reused the FA310TX network cards that came with the Netgear DB104 Network
Starter Kit. I think these are the best NIC cards I've come across in a
long time. I mention this because many of the problems experienced during
a networking install can be traced back to the NIC cards. I've also found
some incompatibility issues between certain NICs and motherboards. These
NIC cards have more than just the standard Link and Activity lights; there
are five LED's on these cards. Talk about information overload, but that's
really a good idea. Having to troubleshoot your install? Why not look behind
the computer at the NIC card and decipher what all those LED's are trying
to tell you about the status of your network? With such good NIC cards available
I'm assured that any problems I could experience were with the router and
not elsewhere in my setup. If you are going to be purchasing NIC cards to
go with this router I highly recommend the FA310TX units. Did I mention
that they are blue? Who wouldn't like that?
I
recommend in any networking project that you install your NIC cards first.
If you are going to have resource problems or detection problems with any
computer I think its better to find that out right off the bat before you
get too involved hooking up your hub/router and running all the wiring.
I reused the FA310TX network cards that came with the Netgear DB104 Network
Starter Kit. I think these are the best NIC cards I've come across in a
long time. I mention this because many of the problems experienced during
a networking install can be traced back to the NIC cards. I've also found
some incompatibility issues between certain NICs and motherboards. These
NIC cards have more than just the standard Link and Activity lights; there
are five LED's on these cards. Talk about information overload, but that's
really a good idea. Having to troubleshoot your install? Why not look behind
the computer at the NIC card and decipher what all those LED's are trying
to tell you about the status of your network? With such good NIC cards available
I'm assured that any problems I could experience were with the router and
not elsewhere in my setup. If you are going to be purchasing NIC cards to
go with this router I highly recommend the FA310TX units. Did I mention
that they are blue? Who wouldn't like that?
 Installation
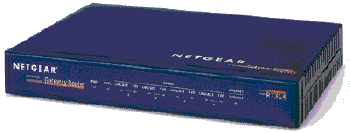
of the router went without a hitch. Again, Netgear has clearly labeled all
the connections and that will speed installation quite a bit. One thing
that I mentioned before is that all the port connections are on the rear
of the unit. This is more a matter of preference than an actual standard,
but most manufacturer's of components such as cable modems and DSL modems
are placing their connectors on the rear of their units. Most professional
networking components have their connectors on the front of the unit, but
that may become a tangled mess for most home based installations. If you
like the clean look of a unit that has its ports on the rear then the RT314
will not disappoint in that area. The software setup of the router is conducted
through your web browser, so you must have at least IE or Navigator 4.0
or higher. The included resource guide has a PDF set of instructions that
are very thorough should you need to refer to something else. I had no problems
setting the router up, and there were even instructions included for RoadRunner
cable modem users like me. That is a very thorough set of directions.
Another thing I always
look for with networking components is the included manual. It is my opinion
that these components should be as easy to install for the first time network
installer as well as the seasoned network troubleshooter. Netgear didn't
let me down in this area. The directions take you from the initial connections
of the cables all the way through the software installation and configuration
of the TCP/IP protocol. There is even a small troubleshooting area that
covers the basic problems most users run into. The included instructions
are packaged in a map-style fold out manual. While I prefer a bound manual
there is some logic to this type of manual design. You can lay it out in
front of you while you perform your installation and follow the steps more
easily. Just make sure you take care to put the manual away so you don't
lose it. There is some very important information in it that will ease installation
for users of specific cable/DSL setups such as my RoadRunner situation.
